So I was in my friendly local game store when I ran across this collection of paints. Besides all the spaceship minis, I have an occasional Napoleonic Army habit, so I’m always looking for new ways to speed up my painting. While I have been meaning to try Army Painter’s Quickshade, I’m a bit of a rupophobe. Since their instructions recommend that you lay out a tarp and wear grubbies, I’ve been loathe to try that product.
This one, however, piqued my interest. Does it really do what it claims?
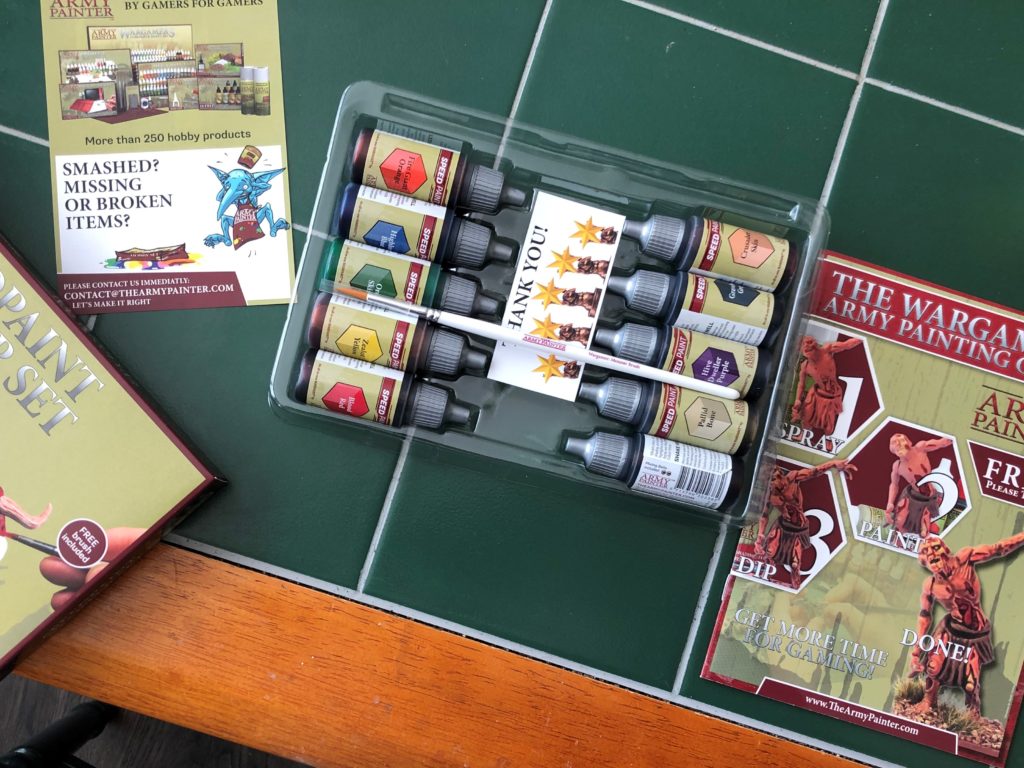
So it’s a pretty normal starter set: ten different colors of paint, a paint brush (Army Painter calls this a “Monster” — it might be equivalent to a 1 or 2), company contact information, and an instruction booklet.
The instruction booklet is useless — it covers their standard line of paints, and the Quickshade, but doesn’t include anything about using the Speedpaints. The brush is of decent quality (like all Army Painter brushes), but it’s too big for what I’m up to. I ended up using a Windsor & Newton 0 Cotman brush instead.
Of the paint, the ones I’m using for this project are: Orc Skin (duh), Gravelord Gray (for the metals), Hardened Leather (for the leather), Zealot Yellow (for the cloth), Pallid Bone (it’s the closest thing to white in the box), and Blood Red for accents.
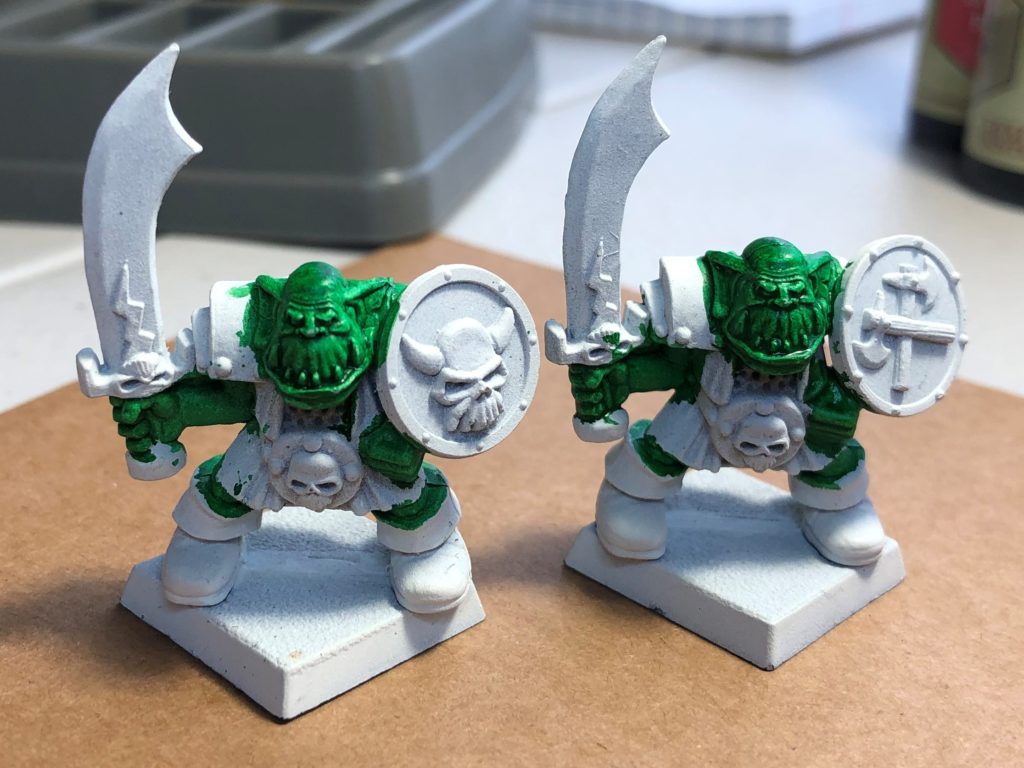
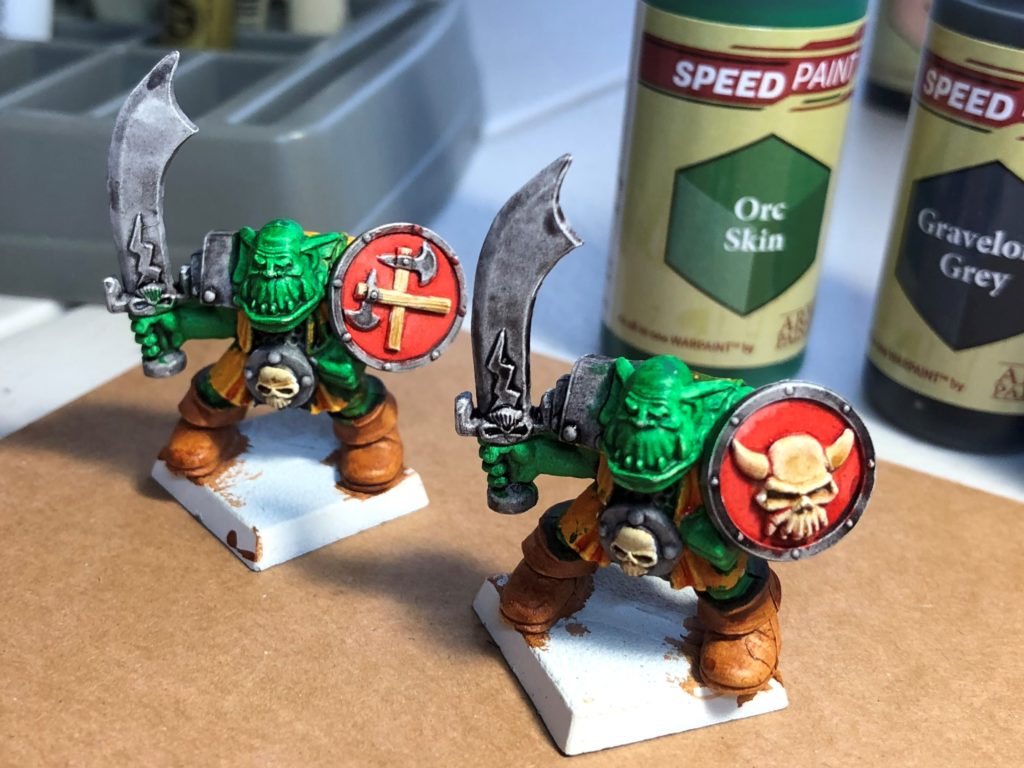
These are the jokers that I’m going to paint for the first test:
Yes, that caption is right. I have a huge collection of Warhammer figures from the days when I played Warhammer Quest, in various states of completion. I figured these would work to the Speedpaint’s strength — their texture makes them wonderful to paint with washes and drybrushing. If the Speedpaint didn’t work on these guys, I figured they wouldn’t work on anything.
I’m not going to necessarily show every single step for this review. In this case it’s two steps. I normally work from the inside out, so I started with the Orc Skin on the flesh, along with a bit of the Gravelord Gray in the exposed chainmail. The consistency of the paint reminds me of painting with inks, but instead of the more open areas being very pale versions of the color, this left a vibrant green. The shadows are pronounced, and the highlights are comparatively subtle.
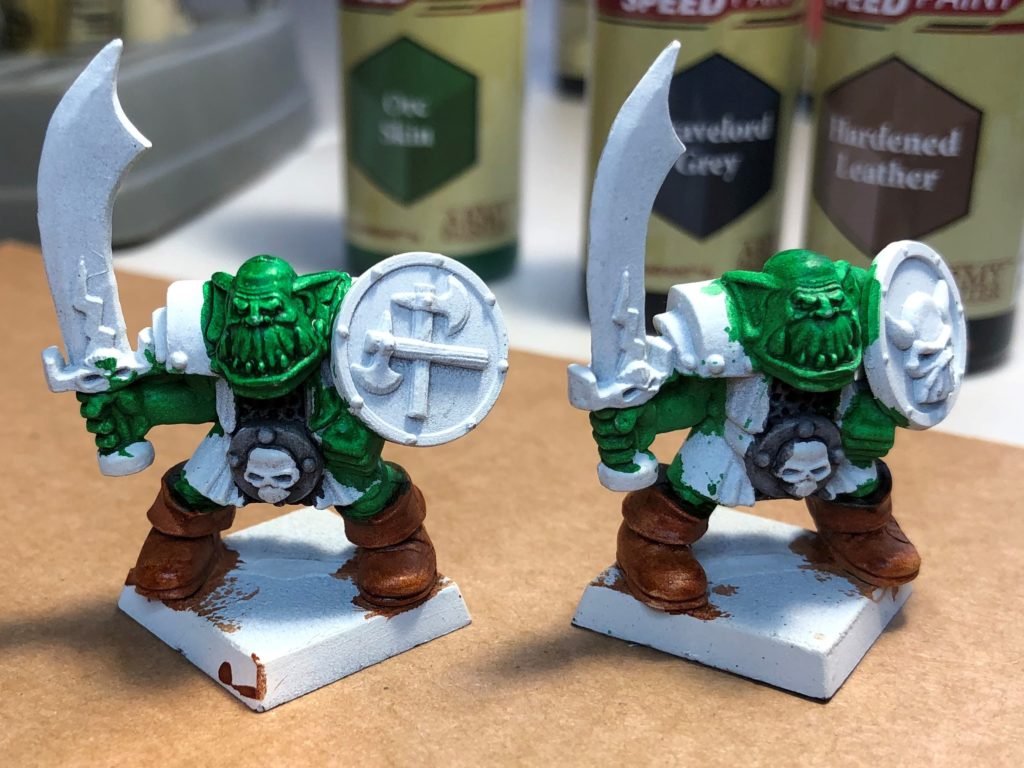
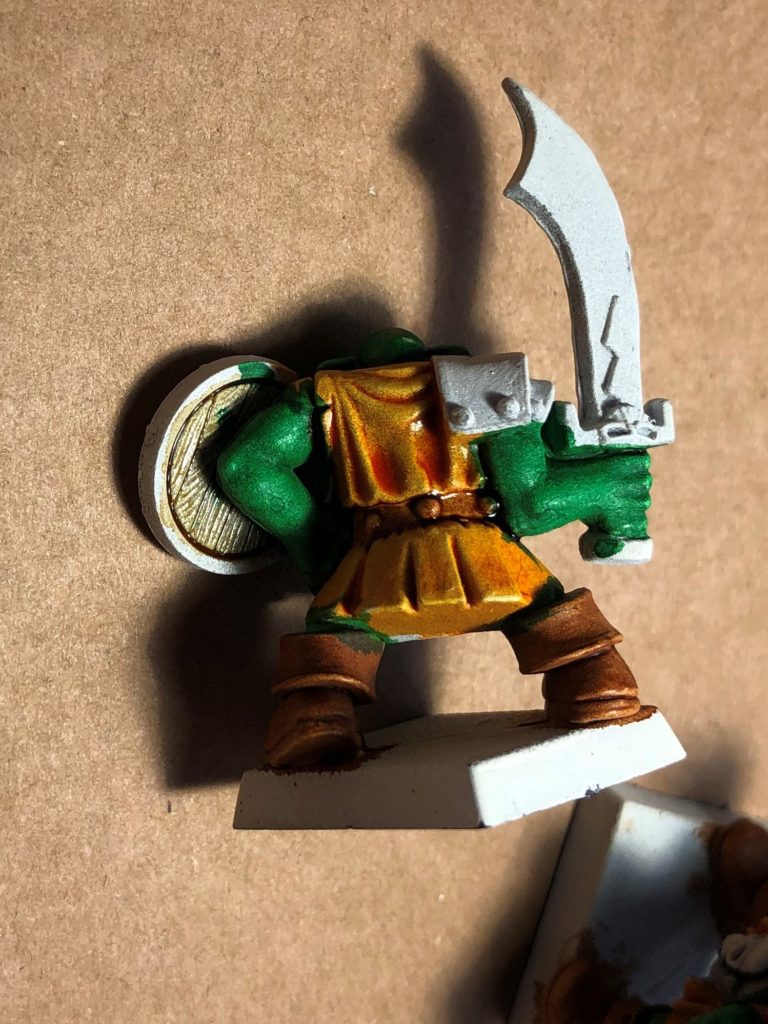
So this is a little farther along, with their boots painted Hardened Leather, and the belt buckle the same Gravelord Gray. Now, one of the things I do when I’m painting is slop — I don’t worry about it normally, because I can go back and touch up the edges. However, this is where I begin to see a challenge with these paints — where the leather and the skin overlap is a muddy color, which is weird because the skin was dry by this point.
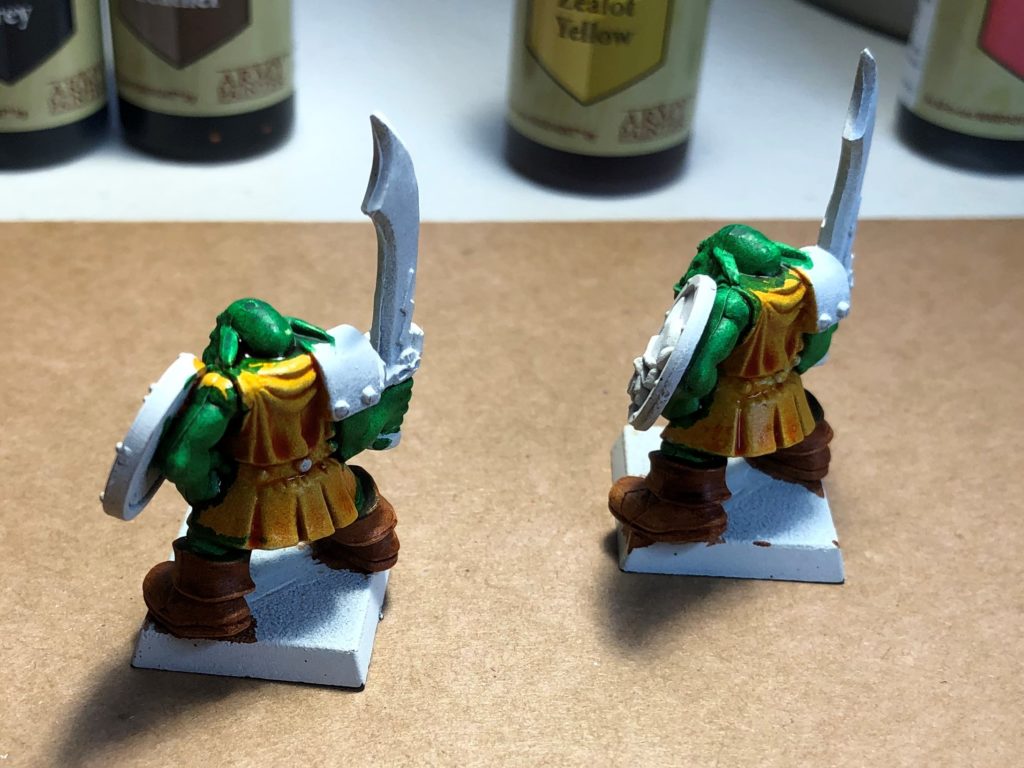
Adding Zealot Yellow brought the issue to the fore. As you can see in this picture, painting over the Orc Skin didn’t eliminate the green at all. Some paints are thin, and you need multiple coats to cover previous coats, but the Speedpaints are beyond that. They’re like water colors.
In other words, instead of painting inside out, I really should be painting light to dark.
So this is after a few more steps. I’ve painted the back of the shield with the Pallid Bone, and painted over the belt with the Hardened Leather. Things that struck me (in no particular order):
- The Pallid Bone again shows off how solid the shading is.
- The Zealot Yellow shows some of the artifacts of a thick wash. The part of the shirt below the orc’s waist is very nice, but the part above the waist is over-shadowed in the softer folds. This is the only color that I’ve noticed this with so far.
- Where the Hardened Leather and the Orc Skin overlaps on the boot is a greenish-gray. While painting over the Zealot Yellow with the leather works, leather over skin doesn’t.
Here we are a little farther in the process. The Pallid Bone still looks great, but I can’t really say anything about the Blood Red, since the shields don’t have any real texture.
Here they are at the end of the process. I haven’t decided what to do with the base yet, and putting Pallid Bone over the already-green teeth didn’t do a darned thing. The other thing that you can see in this picture is that Gravelord Gray counts as “lighter” when compared with Orc Skin and Blood Red.
So the review so far is: they do provide a triad-type result in one coat, but they’re like watercolors in that you can’t really paint over another layer. In fact, you’re probably also limited to white primer, because the other primer will show through more strongly than usual.
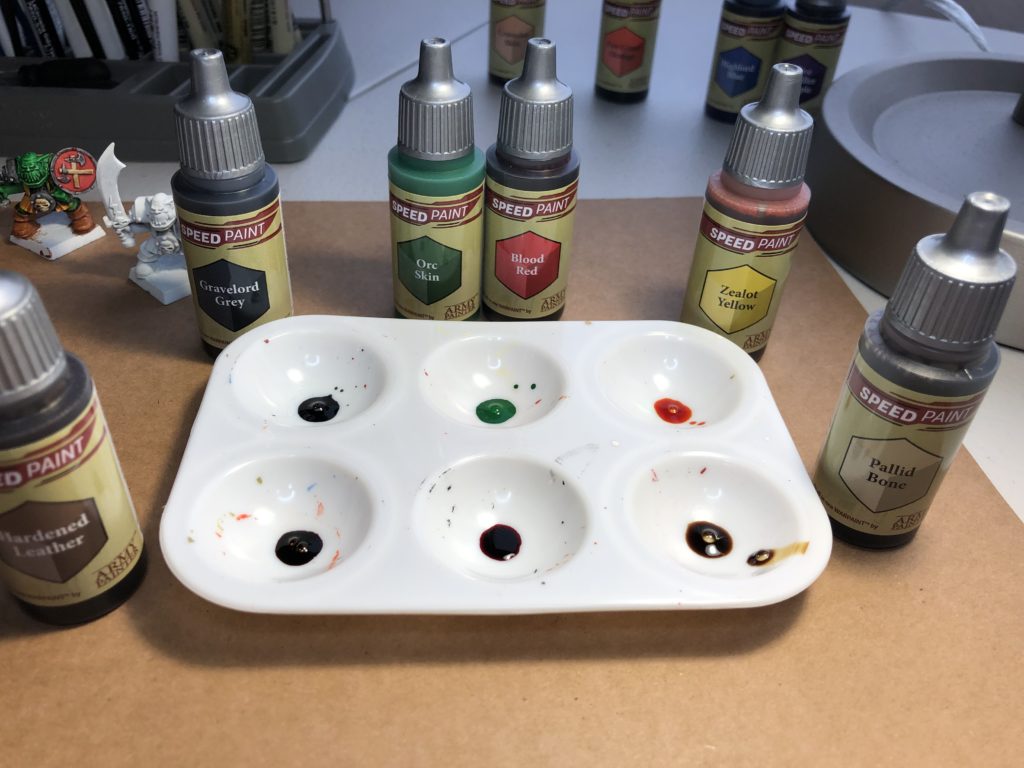
There is also another small danger. It isn’t necessarily obvious which colors are which when they’re wet. Here’s a picture of my palette when I was done (the bottles are next to their paint, with the Blood Red being the one in front and center):
The Orc Skin is about the only one that’s obvious. If you know the Zealot Yellow is the orange one, you can find it again — but that’s not the color I’d expect it to be. Obviously, you have to be very careful keeping track of what you’re doing with these.
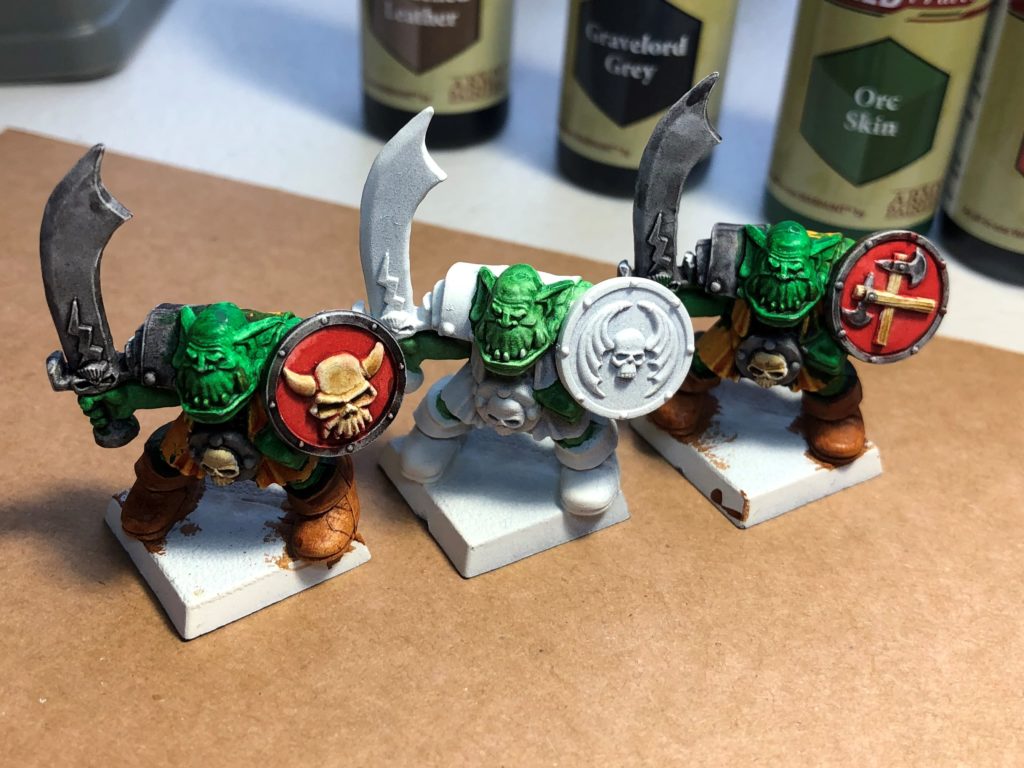
Lastly, a preview of the next in this review series: mixing paints. I wasn’t pleased with the final color of the orc flesh — I’m used to it being a little more towards khaki. The unfinished orc in the middle of this picture is painted with two parts Pallid Bone, and one part Orc Skin:
Obviously, a little bit of that green goes a long way. However, the paints seem to mix like normal ones, and you can tell the difference. I’m going to finish off that third guy for next time, mixing paints all the way so we can get a feel for the results.
’til then, take a look at my spaceship combat game.

